Web scraping basics: A developer’s guide to reliably extract data
The web is complex and constantly changing. It is one of the reasons why web data extraction can be difficult, especially in the long term.
It’s necessary to understand how a website works really well before you reliably extract data.
Luckily, there are lots of inspection and code tools available for this and in this article, we will show you some of our favorites.
These tools can be used for free and are available for all major platforms.
Developer tools
All major browsers come packed with a set of development tools. Although these have been built with the goal of building websites in mind, they can also be used to analyze web pages and traffic. These are some pretty powerful tools for working with websites.
For Google Chrome, these developer tools can be accessed from any page by right-clicking then choosing 'Inspect' or using the shortcut 'CTRL + shift + I' (or '⌘ + Option + I' on macs).
You can use these tools to perform some basic operations:
Checking the page source
Most web pages contain a lot of javascript that needs to be executed before you can see the final output. But you can see how the initial request looks before all of this by checking the page source. To do that you can right-click and then click on 'View page source' or use the shortcuts:
Press CTRL + U (⌘ + Option + U) to view source
Press CTRL + F (⌘ + Option + F) to search
Tip: You should always check the page source as it can contain the same information in more reliable places. For example, you may find the title of a product you're scraping in a meta tag that is not displayed in the rendered output.

Inspecting traffic
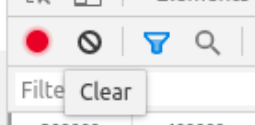
Sometimes the information you're looking for is not loaded with the first request. Or perhaps there is an API call that loads the data you need. In order to “catch” these calls, you'll want to see what requests are needed to load a certain page. You can find out this and more in the 'Network' tab. This is what it looks like:

You can filter requests by their URL in the 'Filter' input box:


Inspecting requests
Of course, you'll also need to know the details of individual requests. If you click on any of these you'll be able to see a lot more information such as request and response headers, cookies and the payload used when sending POST requests for example.
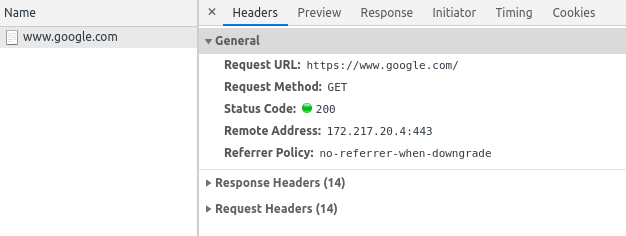
Let's take a look at one of the requests needed to load the main page of google.

This is the preview of a request, you can see here information such as the status code, URL, and type. Clicking on this request we can get even more information:

Both are very useful for debugging since for JSON API calls, the 'Preview' tab will display an easy-to-navigate structure while for HTML responses you can view the rendered response or simply the source HTML in the 'Response' tab. The search feature also comes in handy sometimes.
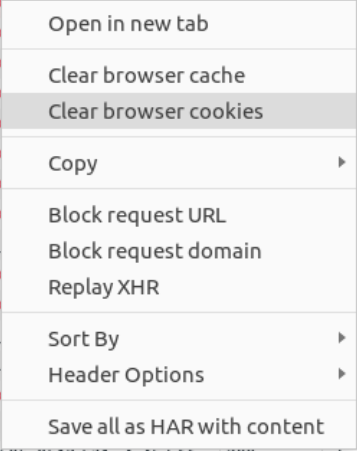
You can clear your browser cookies and application cache from the 'Network' tab, a feature often used when testing how fast page loads for example, also can be used to clear things such as session ids. Right-click on any request to open this dialog box:


Extensions
There are a lot of functionalities you can add to the browser using a few extensions. Our favorites for web scraping::
- DFPM - don't fingerprint me, an extension that checks how the website identifies your device, useful when you're getting blocked, and a great resource for learning
- XPath helper - a bit more visual and assisted XPath tool, you can see the exact output of an XPath directly in your browser. Be mindful though as this may not be the same as what you will get in your spider
- VPN extensions - there are plenty to choose from here with lots of free options but I recommend using a paid service if possible (see the section below)
Using proxies to reliably extract data
You should always check how changing your IP influences the page. You may be surprised! On some websites, it's important to check how changing your location affects the displayed result (can be fewer items, a redirect or simply getting blocked). For this, you can use several tools such as:
- A VPN browser extension, be careful though, some may have security issues such as leaking your IP, use a paid version if you can, or be sure to use a safe free trial of a paid one
- Setup a proxy in your machine: another viable option can be to set a proxy directly on your operating system. You could also use a VPN service that often comes with desktop apps
If you have lots of extensions like me, you may wonder at some point, how these influence certain requests. You can check how your browser cache changes the loaded page (defaults, cookies, extensions, etc.) by opening the page in an incognito tab
Conversely, you can also enable any extension you need in incognito mode from the browser's extension settings.
Postman, the REST client
Sending requests is easy.

Postman's UI is pretty intuitive and has lots of features. You have the basic information about your requests such as the URL, its parameters, and headers to fill in. You can also enable or disable each of these as you like for testing.
You can of course send POST requests as wee using postman, the only difference is the request body which can be specified in the 'Body' tab where multiple formats are available.

Tip: postman will save cookies from a response by default. You need to disable these yourself if you need to or change how cookies are handled in the 'General' section from settings which you can access in the top right by clicking on the wrench icon.
Collections
An awesome feature is the ability to store requests for later use, you can create a collection of requests. Just create a new collection and save the request there.
With proxies
It's also pretty straightforward to configure a proxy for postman. You can use the system settings or a specific proxy with or without login from the settings panel.
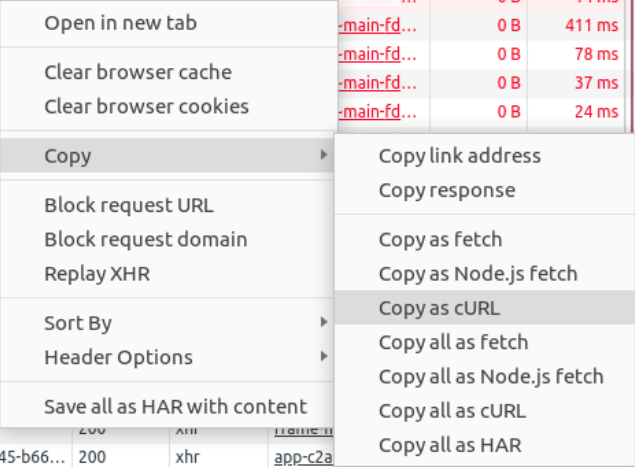
You can import curl requests into postman (such as those generated from a browser request as I mentioned before). This can save you lots of time by helping you quickly reproduce a request.
This can also be done the other way around: export your postman request for curl or python. By default, it will use the requests library so if you need it for Scrapy you must change it a bit.
Scrapy shell
Sometimes you will need to code some logic to extract the data you need. Whether it is testing selectors or formatting data, Scrapy has you covered with the Scrapy shell. This is an interactive shell designed for testing extraction logic for web scraping but it works with python code as well.
You need to have Scrapy installed in your python environment:
$ pip install scrapy
Then you can simply run 'scrapy shell' to start it or you can add an URL as the first parameter and it will send a get request to that.
$ scrapy shell
$ scrapy shell <URL> # to start with a plain GET request
Tip: The default python shell that scrapy uses can be enhanced. If you install IPython in your environment, Scrapy will detect it and use that as the shell which enables lots of useful features such as syntax highlighting and tab completion to name a few. (bpython is also supported)
You may now want to check the docs by typing shelp() which will display information about various available objects. One useful feature is the 'view' function which can be called with the response as a parameter.
Once you are inside the shell, you can use 'fetch' to send a get request for a given URL or directly fetch a scrapy request object (which you can later use in your spiders!):
fetch('') # this is equivalent to: from scrapy import Request req = Request('') fetch(req)
Since now you have access to a response object you can also test your selectors. This is a basic example of CSS and XPath selectors:
<div id="topping">
<p>Pineapple</p>
</div>
# css selector >>> response.css('div#topping p::text').get() 'Pineapple' # xpath selector >>> response.xpath('//div[@id="topping"]/p/text()').get()
'Pineapple'
Note that the shell checks for a valid Scrapy project in the current directory and makes use of this when sending requests or fetching project settings. This can be useful when you're trying to debug your middlewares!
Since the shell will use your project's settings it will also make use of existing middleware so you can use these to manage sessions, bans, and more.

Learn more about web scraping
As you have seen, there are many useful tools that you can use to effectively extract data from the web. Some websites are easier than others, but leveraging these tools should make your life a little easier, even when dealing with complex websites.
If you want to learn more about web scraping best practices and how to ensure you can extract data not just now but also in the long term, we have a free downloadable guide that could help you on your web data extraction journey.
